Sitecore XM Cloud forms webhook integration via Sitecore Connect
Sitecore XM Cloud forms webhook integration via Sitecore Connect
Previously we learned about Defining webhook in SitecoreXM Cloud Forms,now we will see how these webhooks can be integrated
via Sitecore Connect.
Sitecore Connect is a feature that allows integration
between Sitecore and external systems or services.
Webhooks are a part of this connectivity strategy, enabling
real-time data exchange between Sitecore and other applications.
Sitecore XM Cloud forms with webhook integration via
Sitecore Connect typically works as follows:
1. Form Creation:
- Create a form in Sitecore XM Cloud using the form builder.
- Design the form fields and layout as needed for your use case.
2. Webhook Configuration:
- In Sitecore Connect, set up a webhook endpoint.
- This involves specifying the URL where form data should be sent when submitted.
- We may need to configure authentication methods for the webhook, such as API keys or OAuth.
3. Form Submission Event:
- Configure the form to trigger the webhook upon submission.
- This usually involves selecting the webhook as an action in the form's submission settings.
4. Data Mapping:
- Define how form fields map to the data structure expected by the webhook endpoint.
- This ensures that the receiving system can properly interpret the submitted data.
5. Submission Process:
- When a user submits the form from Sitecore XM Cloud site, it triggers the webhook.
- Sitecore Connect packages the form data according to defined mapping configuration.
- It sends an HTTP POST request to the specified webhook URL with the form data in the payload.
6. Testing and Monitoring:
- Test the integration thoroughly to ensure data is being sent and received correctly.
- Set up monitoring to track the performance and reliability of the webhook integration.
This integration allows for real-time data flow from
Sitecore XM Cloud forms to external systems, enabling scenarios such as:
- Instantly
updating CRM records with new lead information
- Triggering
automated marketing workflows based on form submissions
- Syncing
customer data across multiple systems in real-time
- Initiating
backend processes or services based on user input
- Updating
external databases when content changes in Sitecore
- Integrating
with third-party analytics or business intelligence tools
Let’s see how this integration works actually.
Webhook Configuration
Access Sitecore Connect -
- Log into Sitecore instance and
- Navigate to the Sitecore Connect interface.
Create a recipe with a starting point as a “Trigger from a
webhook” and setup a webhook
Click on
the Create option and then select Recipe

Give recipe a descriptive name.
To specify that when the webhook should be triggered, pick a starting point – trigger from
an app (as we will fill up the XM cloud form and on submit this will be triggered)

Select an
app and trigger event

We need to
select Webhook from the Apps

There are two options available, Start guided setup or setup manually

Select
Start guided setup, it will guide us through the steps.
We need to
provide the Event name and it will form the webhook url.


We need to
copy this URL and click next, this URL we need to define inside XM cloud forms

The webhook
started listening to the app.
Now go to Sitecore
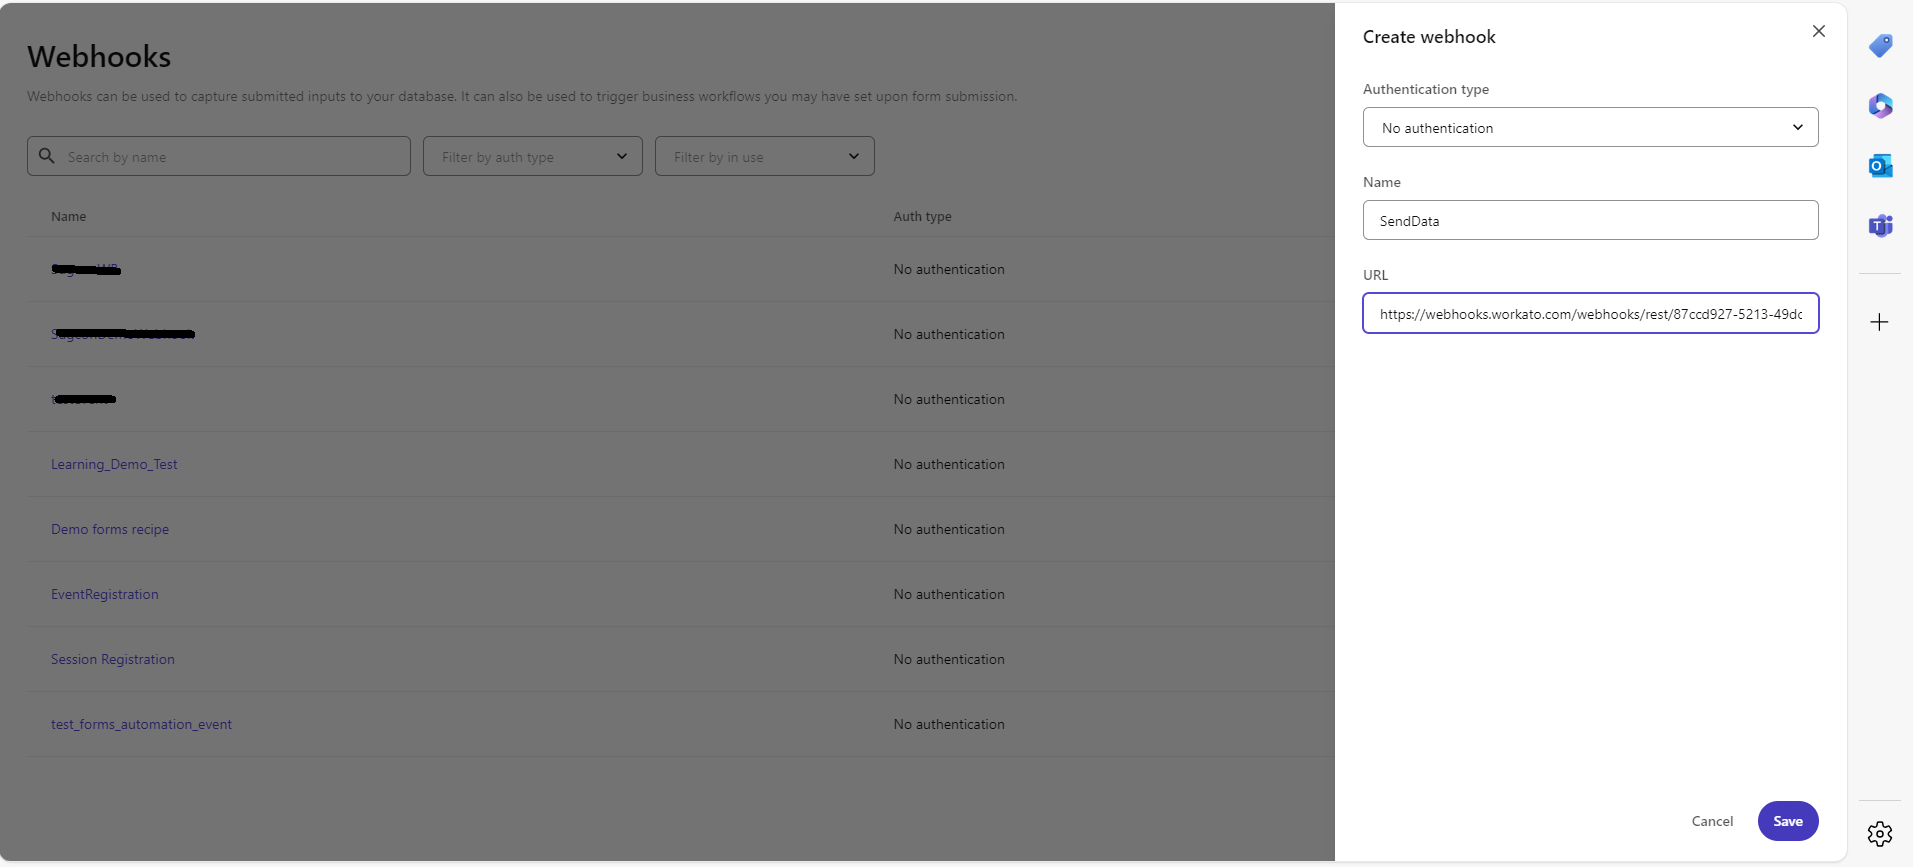
XM Cloud forms, webhook tab and create a webhook there
Provide the
authentication type including API keys, OAuth tokens, or basic
authentication credentials
We are
using No Authentication here for this example.
Provide
webhook a name and URL (we copied from connect) and click Save.
The webhook
is setup.
Now to
integrate this with Sitecore Connect
-
Go
to XM cloud form settings
-
Choose
the Webhook we just created

Click test
webhook or Go to Preview
It opens up
the form, fill all the details here and submit

We can see
the payload is created here

On this test form submission, click submit, it will send the payload to the webhook through the defined URL.
Inside connect, webhook is listening event so we will receive the event there and we are done with webhook setup.


Now the
webhook is setup and whenever user will fill up the form, the payload will be
received here.
To further use this payload, we need to set action in the recipe. We can use any action to connect with external systems here from the available options like Sitecore Send, Slack, GraphQL, Gmail etc.

Stay connected for more updates. We will see in the next blog - How to define this action and integrate Connect with External system.
Thank you!


Comments
Post a Comment